
Lasted updated: 8/14/2025
Estimated install time: 5 – 10 minutes
Parts Required:
- Lexus GS350 Front Camera Mount – No Drill
- 1 M8x1 bolt with nut (included with the bracket)
- Amazon Front Camera https://amzn.to/4mPjUvz
- Aftermarket headunit to allow the above camera to plug into. This will not work with the OEM Lexus headunit. Lexion Automotive is highly recommended.
- Aftermarket headunit to allow the above camera to plug into. This will not work with the OEM Lexus headunit. Lexion Automotive is highly recommended.
If the vehicle has been driven recently, let the car cool down for at least an hour! The radiator and AC condensor are very hot!
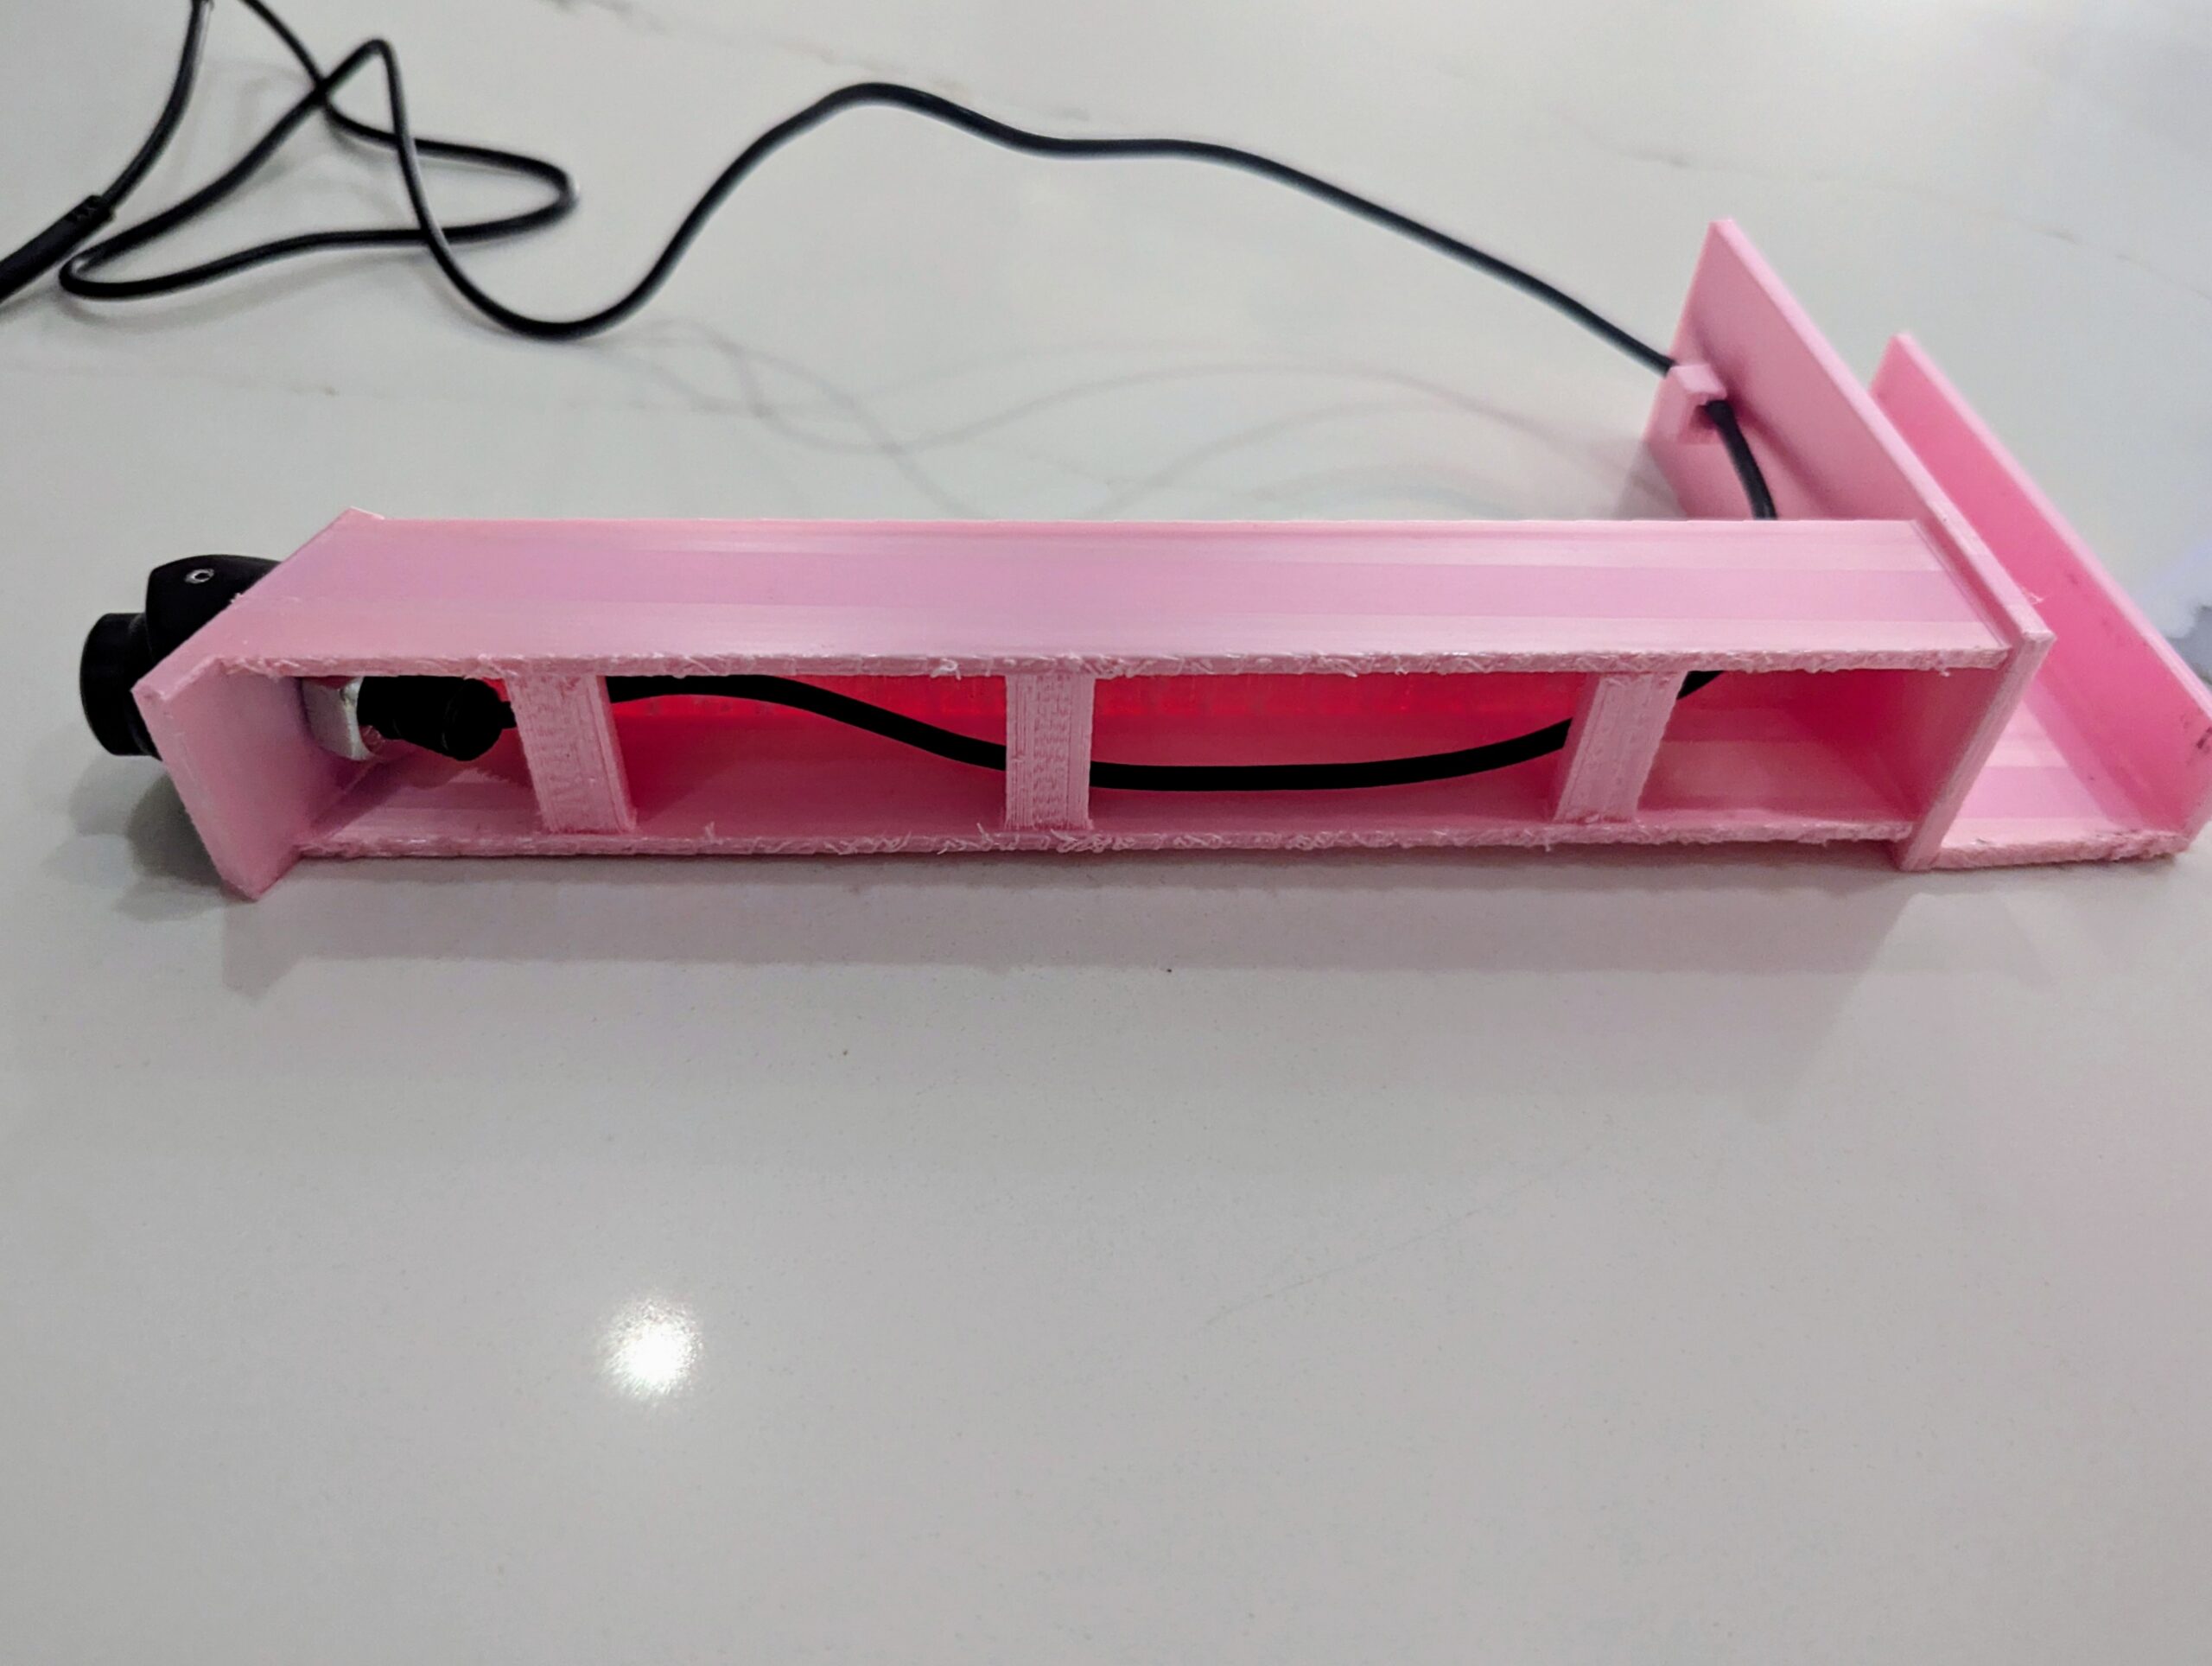
Start by attaching the Amazon Camera to the bracket by inserting the camera through the hole in the front of the bracket and then securing the camera with the included nut on the backside.
Route the wires through the center of the bracket, and above the support braces. Exit the camera through the hole and follow it up the radiator support, through the attached cable stay and then to your wiring.

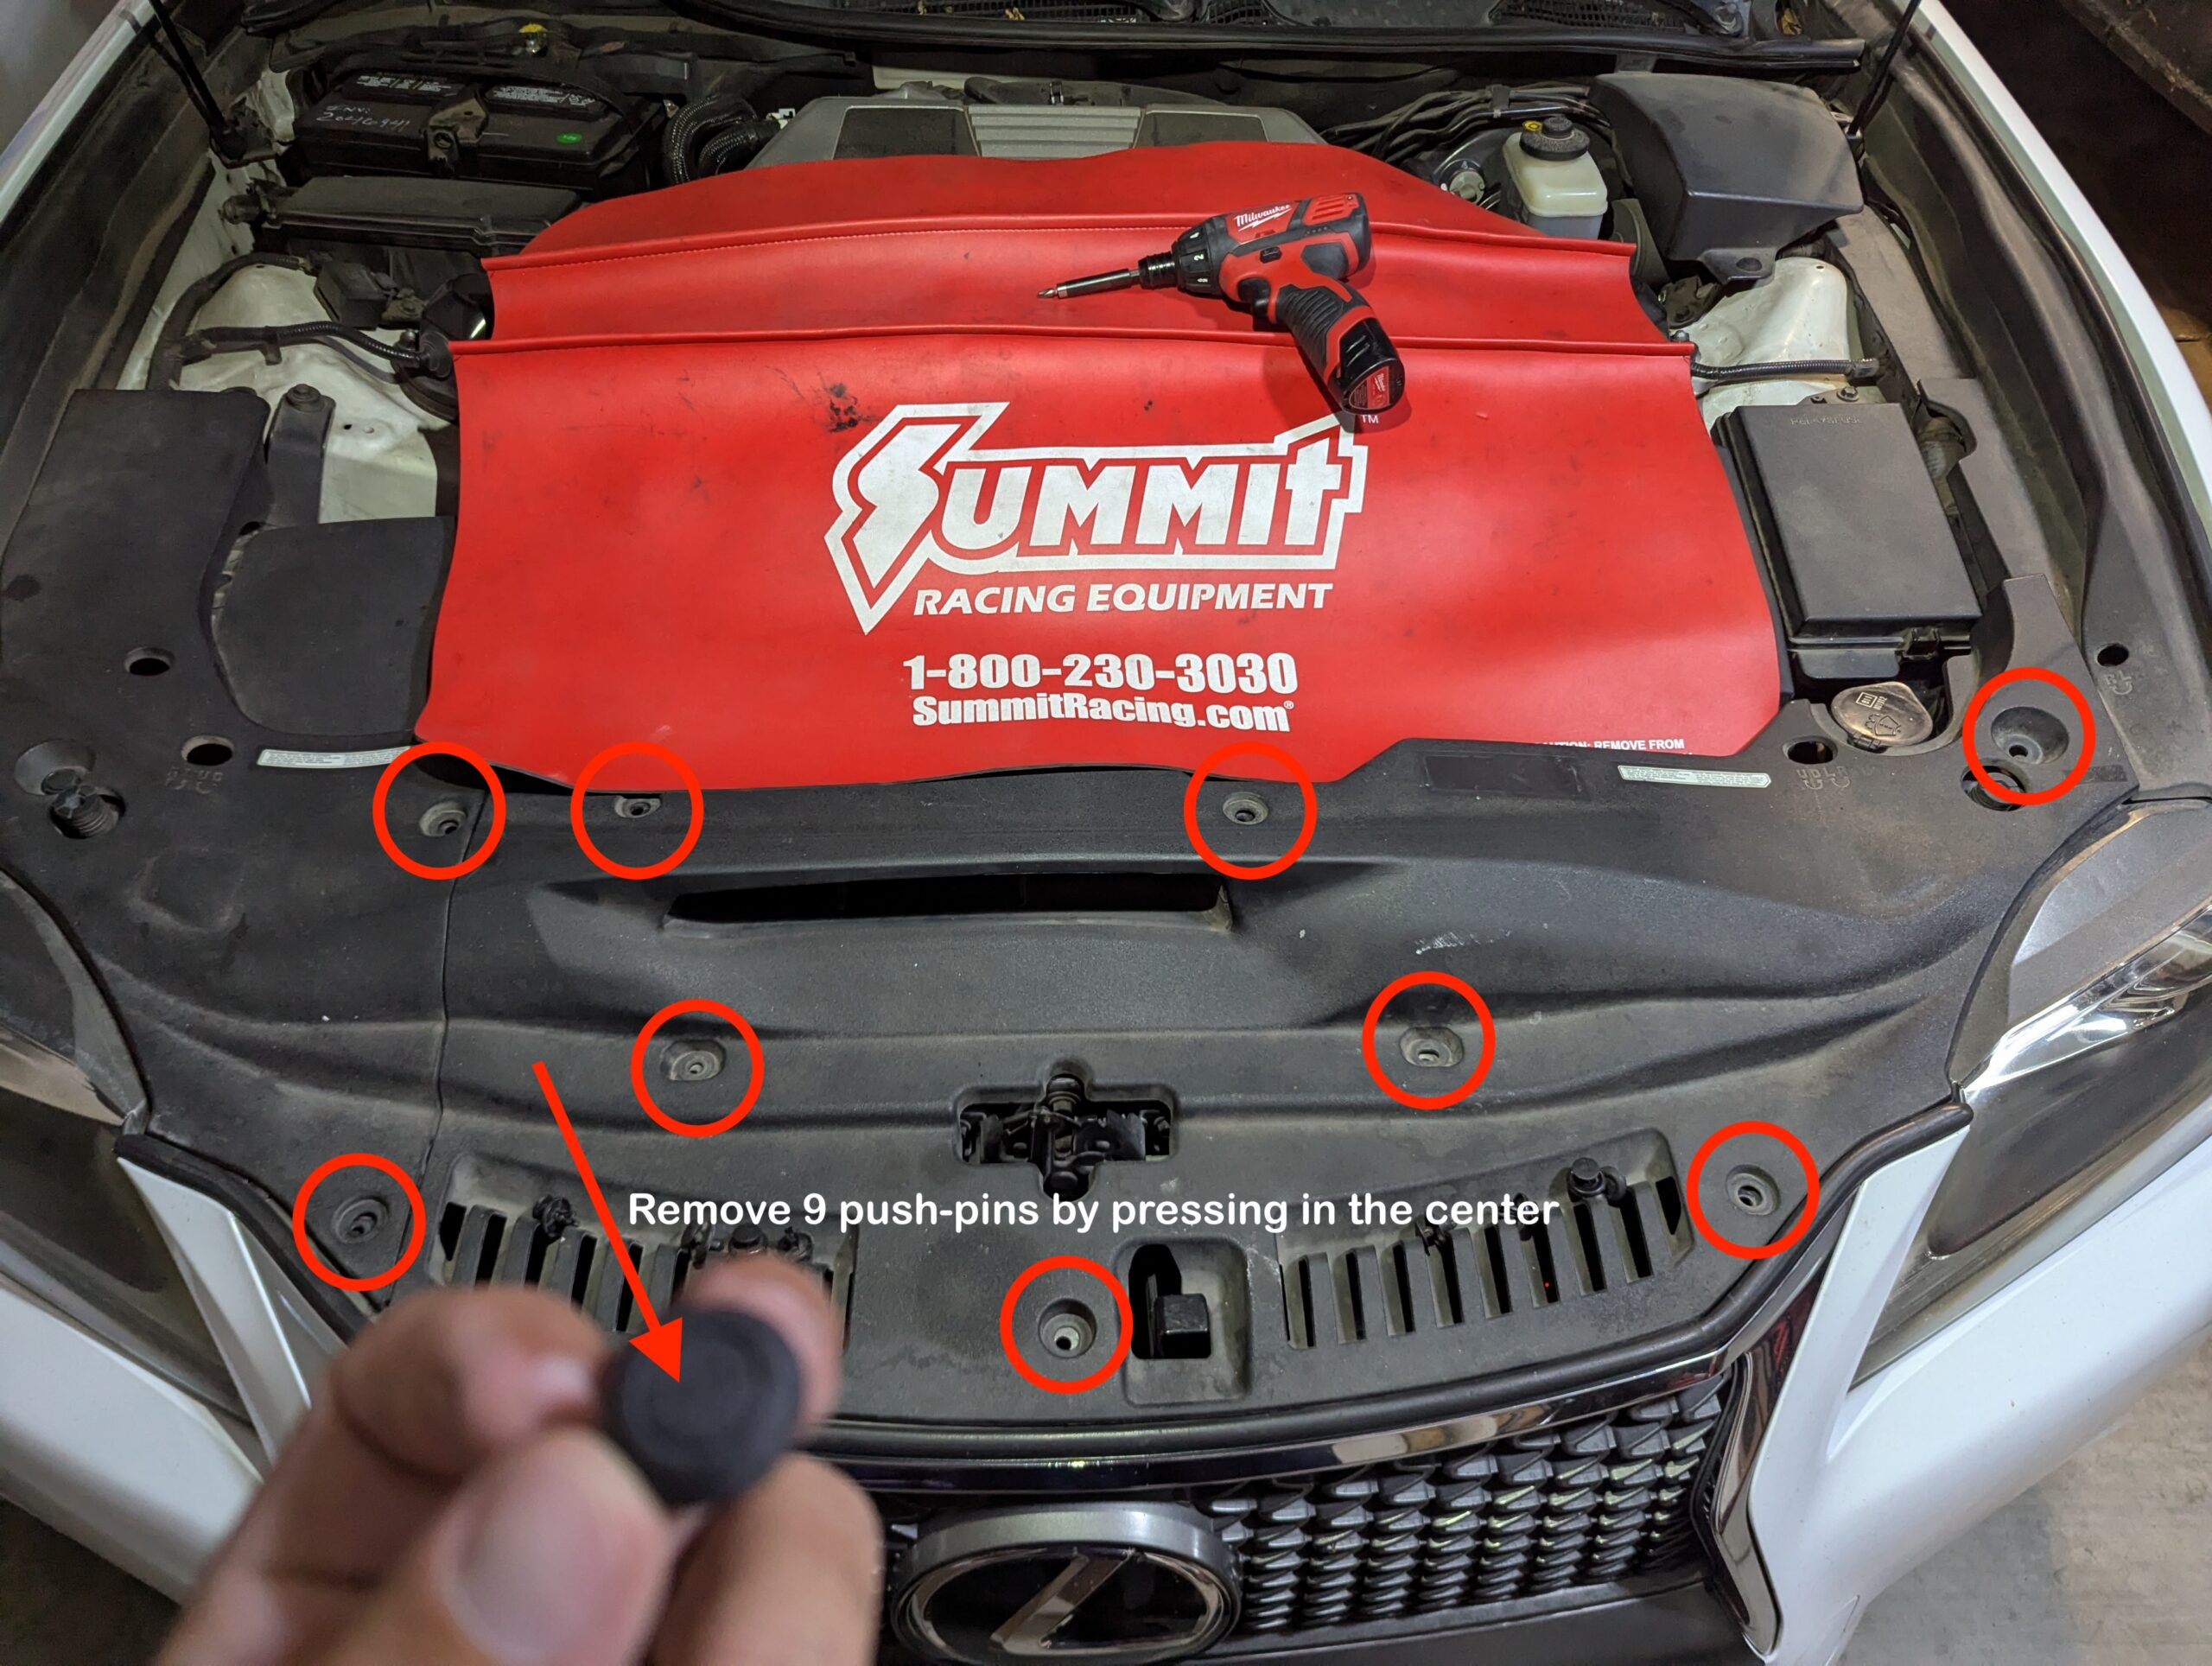
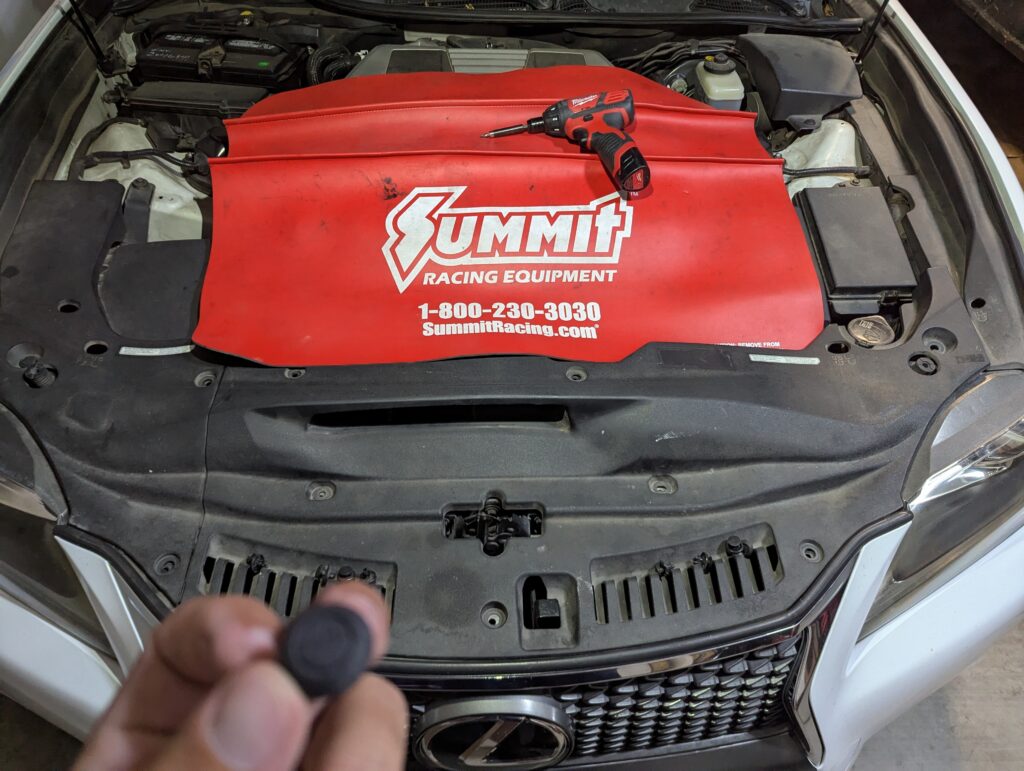
1. Remove Front Engine Bay cover
2. Place bracket onto radiator center support
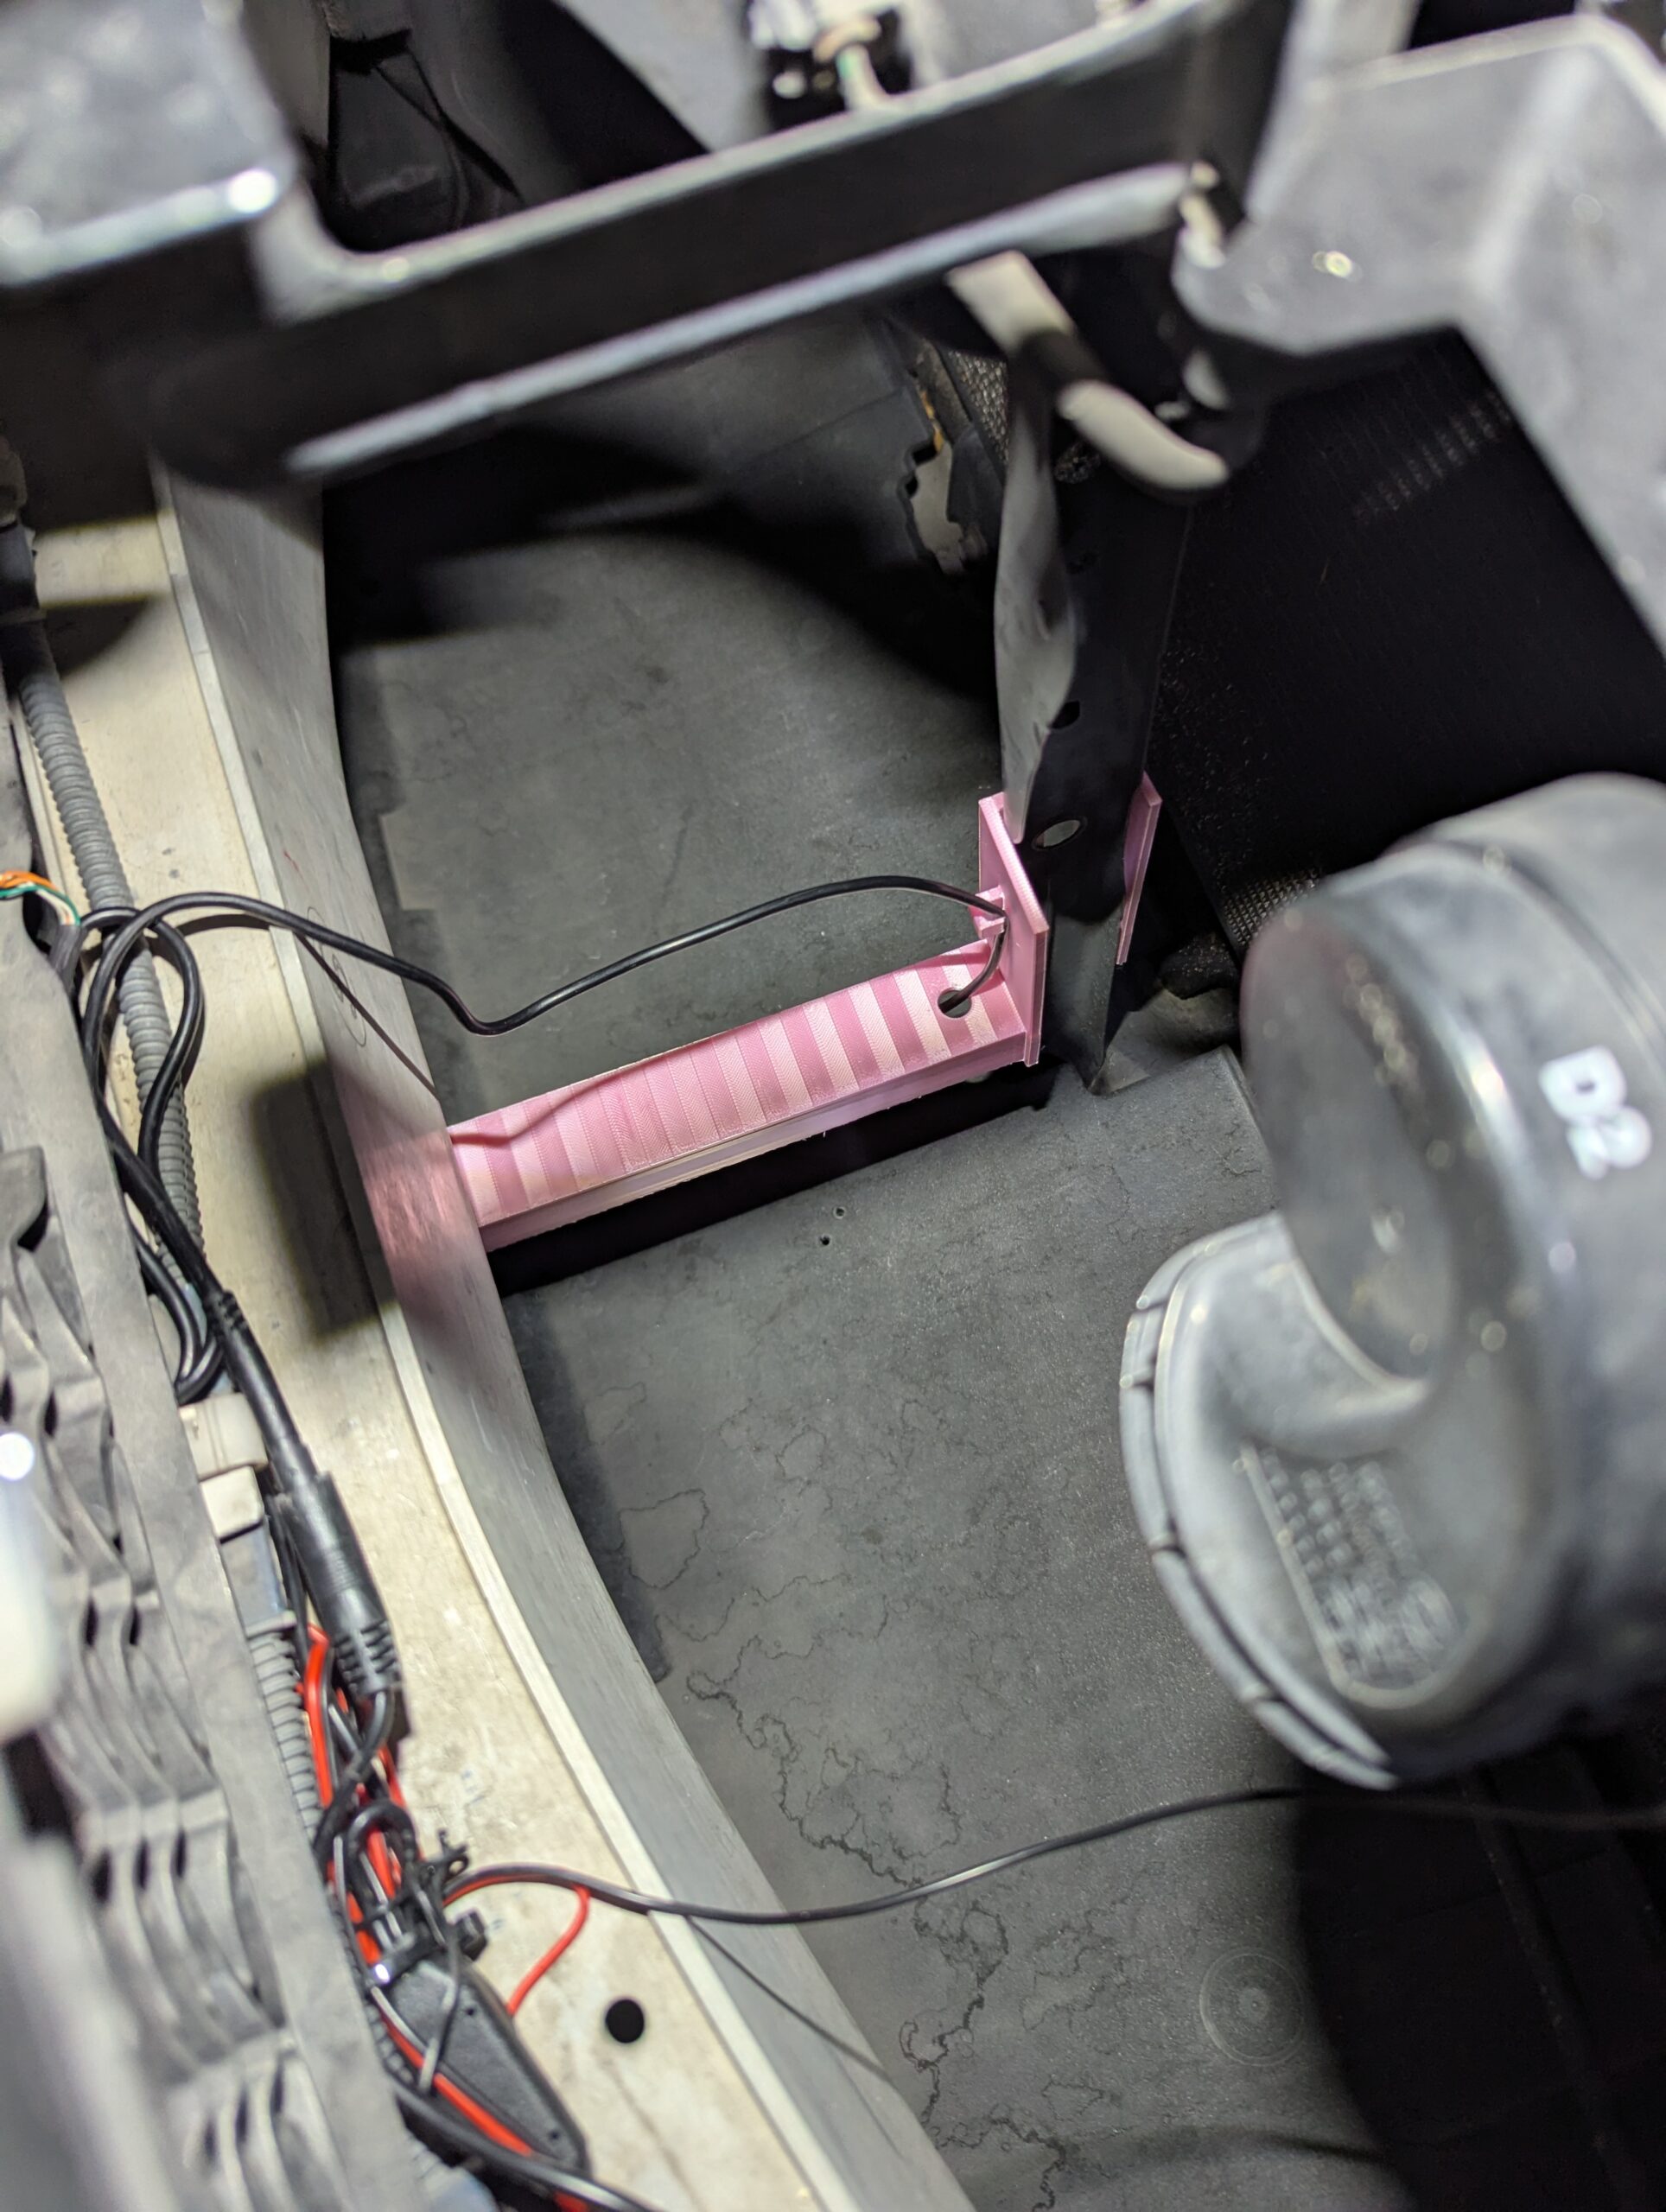
3. Insert bolt through bracket and the radiator center support
4. Secure bolt with nut. DO NOT overtighten! Hand tight + 1/8 turn is all that should be required.
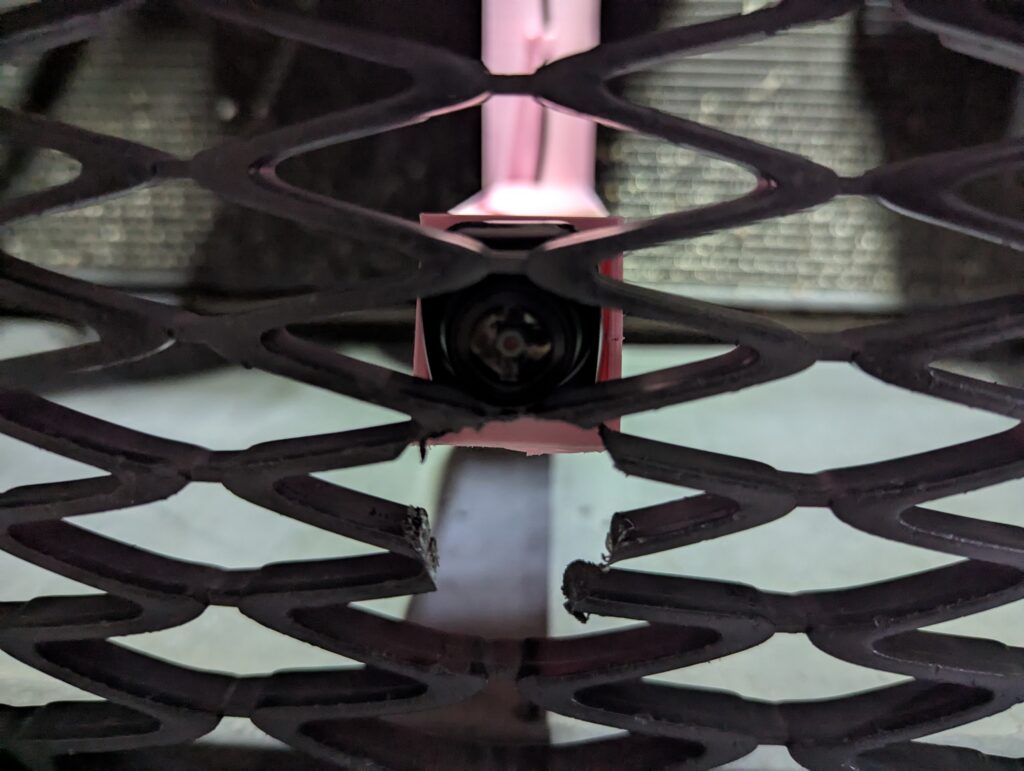
5. Verify camera is in desired location (disregard broken grill from previous damage). If camera is not in desired lotcation, loosen the nut in the previous step slightly, and slide the bracket up or down until it is in the grill/location you like. Tighten nut back down.
6. Verify camera in-side the car. Adjust if necessary by moving bracket up or down, OR adjusting the camera, it has a 360° camera lense that can be rotated if necessary. There is a small hex head screw securing its position. Please consult the camera manual for any further guidance.
** Please Note ** : Some trimming of the grill may be required to remove the outer perimeter black edges when viewing the camera (noted in the image above on the front camera, look towards the outter edges). Try adjusting camera spot first before trimming. The camera bracket was designed to be as far forward as possible so minimal trimming should be required. Always remove the bracket and camera before trimming to prevent accidental damage. When trimming, take careful note of where the camera is actually being prohibited from moving, it is not always by the lense, but by the base. Use a rotary style tool to carefully trim the INSIDE of the grill where it was noted to be touching. Start by removing SMALL portions at time and then reinstall the camera to verify the camera image in the car is the desired image.
7. Reinstall Front Engine bay cover with the 9 pushpins.
The install is now complete. Enjoy your front camera!